Create a survey in Pulsy
Build a Pulsy survey in the BuddiesHR web dashboard's 3-step wizard, from name, anonymity and audience to questions and launch, then send it in Slack.
 SlackUpdated Oct 5, 20262 min read
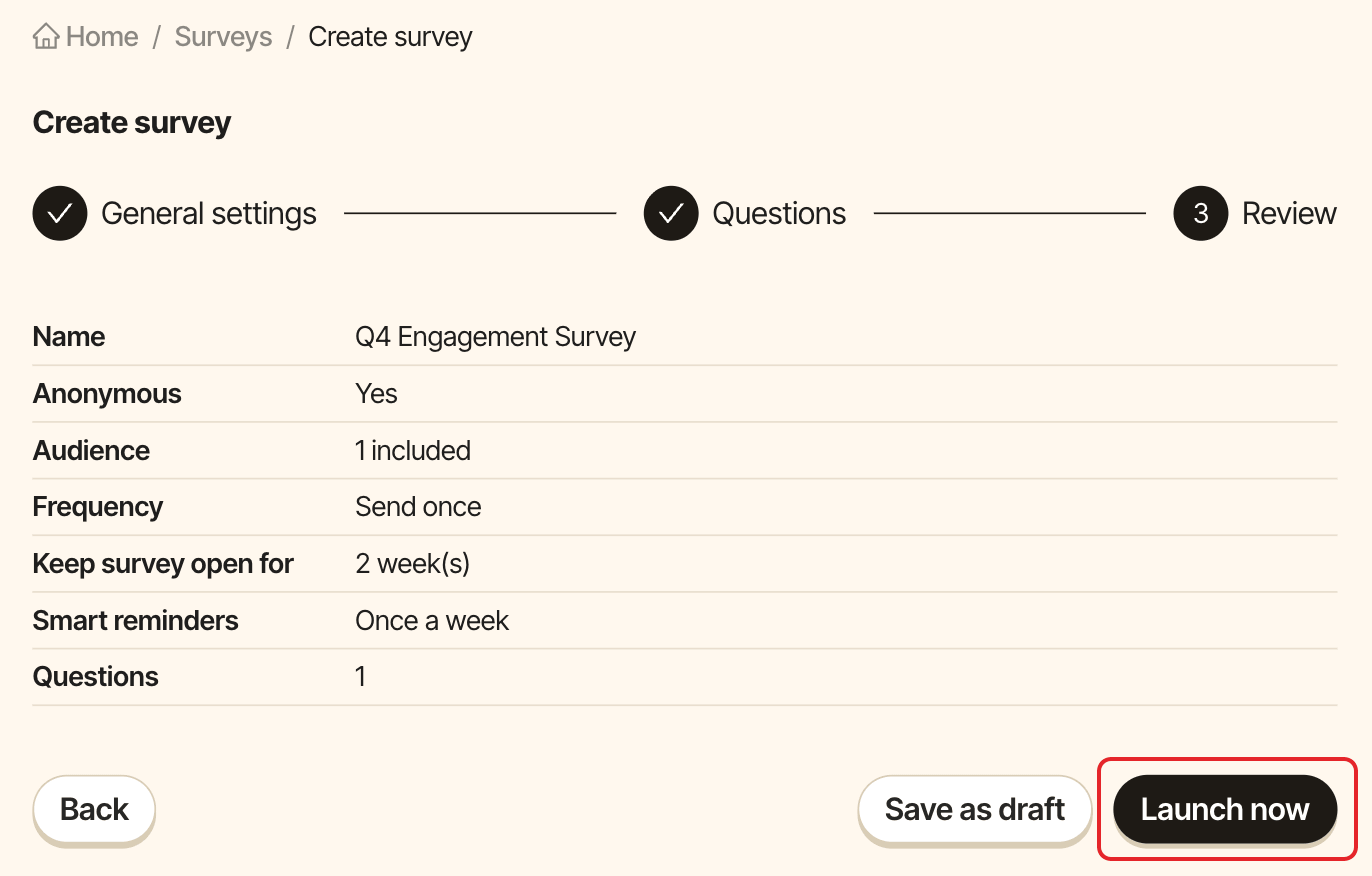
Pulsy admins create surveys in Admin mode of the BuddiesHR web dashboard, with a 3-step wizard: General settings, Questions and Review. Your team then answers in Slack or on the web.
Step 1: Click Create survey#
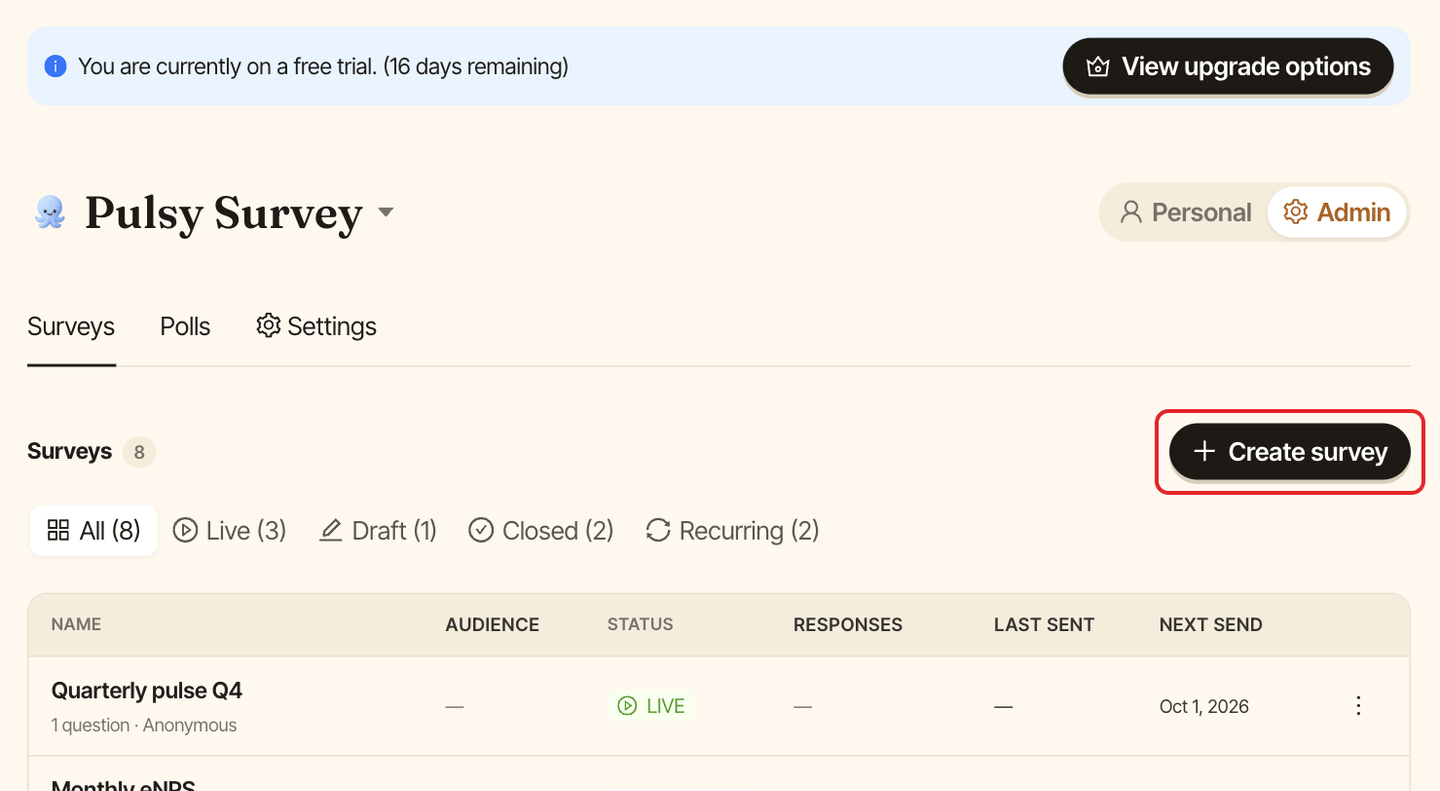
Open the admin dashboard, go to the Surveys tab and click Create survey.
Step 2: Fill out the general settings#
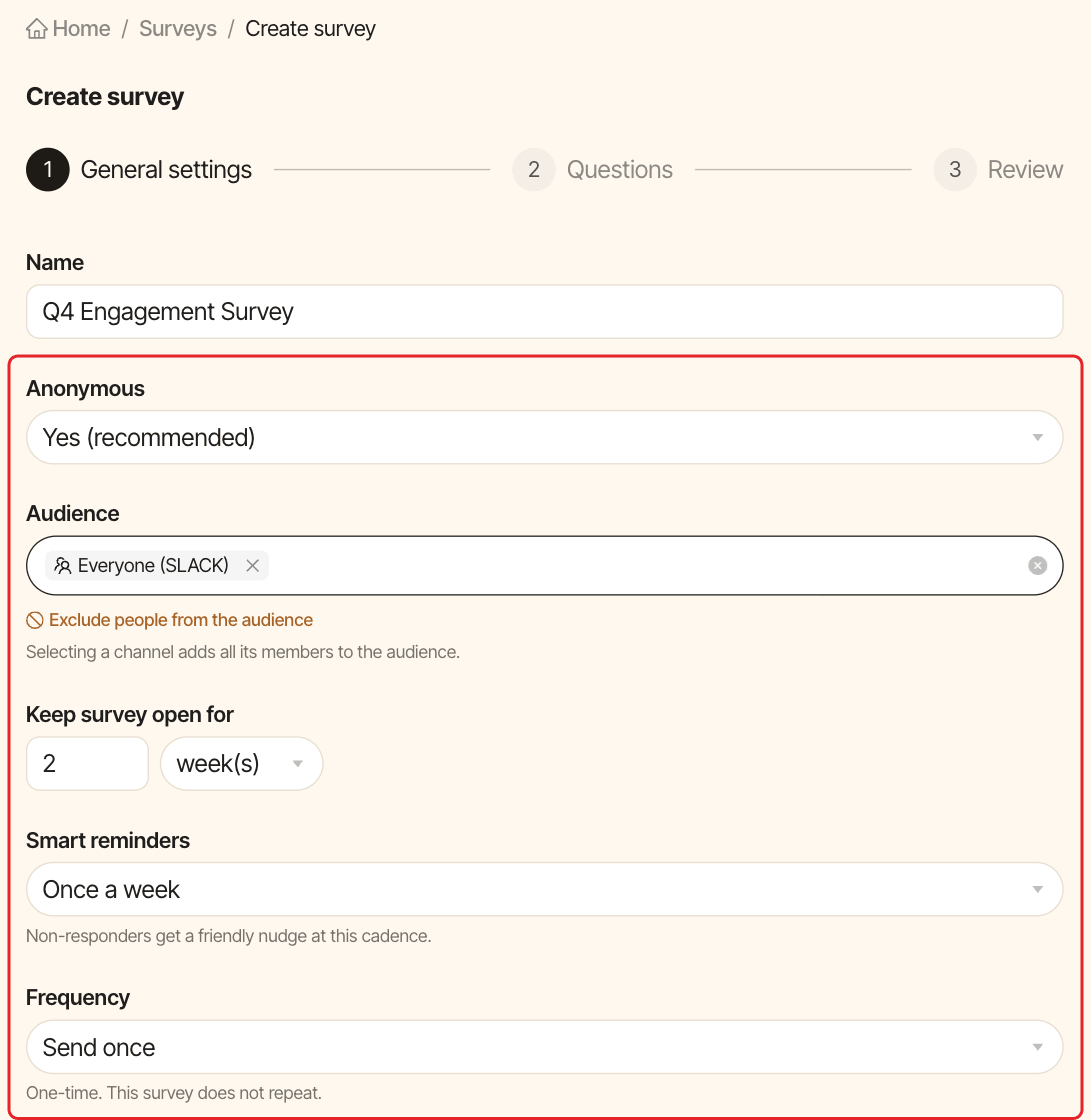
| Field | What it does | Default |
|---|---|---|
Name |
The survey's name, up to 100 characters. | Empty |
Anonymous |
Yes (recommended) or No. You can't change it after launch. See what anonymous surveys hide. |
Yes (recommended) |
Audience |
Who receives the survey. See below. | Empty |
Keep survey open for |
How long people can answer, in day(s), week(s) or month(s), counted from launch. The survey then closes automatically. |
2 week(s) |
Smart reminders |
No reminders, Once a week, Twice a week or Every weekday. See send survey reminders. |
Once a week |
Frequency |
Send once, or a recurrence from Daily to Quarterly. See run a recurring survey. |
Send once |
Choose the audience#
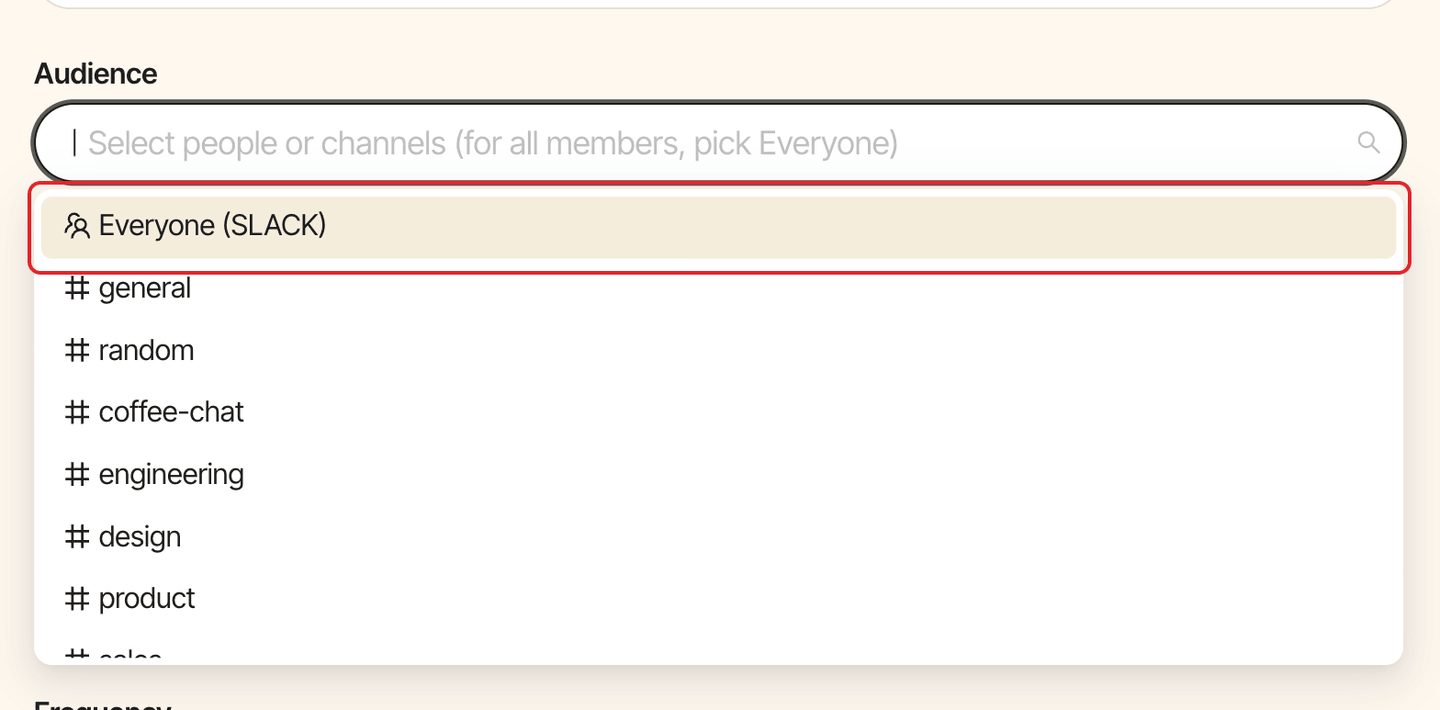
Click the Audience field and pick any mix of:
Everyone, for all members of the workspace.- Slack channels: public channels, and private channels Pulsy has been added to. Selecting a channel adds all its members. Shared channels, such as Slack Connect channels, aren't listed.
- Individual people.
To leave some people out, click Exclude people from the audience and pick them in Exclude people (optional).
Bots, deactivated accounts and guest accounts never receive surveys. The audience is fixed when you launch: people who join a channel later don't receive the survey. For a recurring survey, the audience is worked out again for each edition.
Click Next.
Step 3: Add questions#
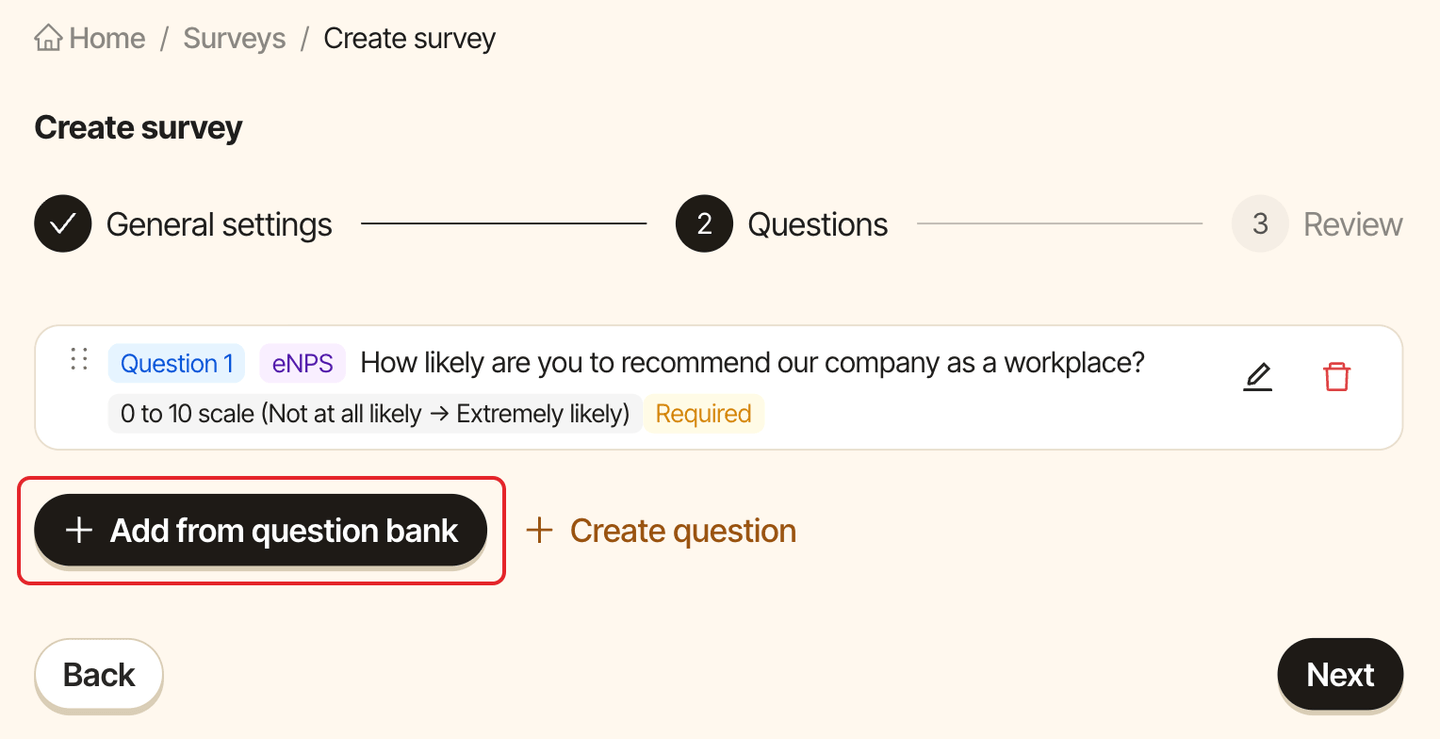
Click Add from question bank, choose a theme in Select theme, keep the questions you want checked and click Add selected. Repeat for other themes.
To write your own, click Create question. Drag questions to reorder them, or remove the ones you don't need. Details in add questions from the question bank or write your own.
Click Next.
Step 4: Review and launch#
The Review step sums up your settings and the number of questions. Then:
- Click
Launch nowto send it. See launch a survey. - Or click
Save as draftto finish later. Drafts are listed underDraftin theSurveystab.
For a recurring survey, the only button is Schedule survey: see run a recurring survey.